
Once known as Google Webmaster Tools, the product was renamed in May 2015, to better represent its wider audience of users. Originally intended to help webmasters get a better view of what’s going on with a website, the resource provided valuable to other internet professionals, such as SEOs, designers, and marketing pros, thus the rebrand.
The Google Search Console is a free service that provides a great deal of information about your website and the people visiting it – but it’s not the same thing as Google Analytics.
If you want to know how to make it work for you – even as a business owner – this guide is for you.

Overview
Getting Starting: Adding and Verifying Your Site in Google Search Console
Before you can start using the tool, you have to add the website to your account, and verify that you either own it, are the webmaster for it, or are another authorized user. Because of the depth of information provided about a website, they aren’t just going to let everyone add any website they want to. If they did, it would be all too easy to get information on your competitors, and for your competitors to get the information on you.
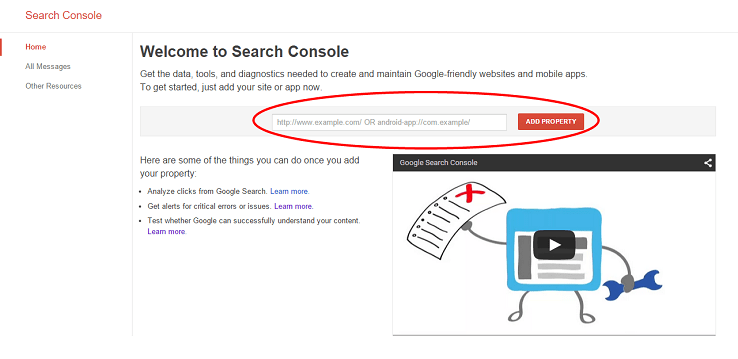
All you have to do is log into your Search Console account. From there, you’ll see red button that reads “Add Property”.
At this point, your site is in your account, but you have to verify it before you can do anything else. There are multiple ways to verify your website, and you can choose the one that works best for you. There’s no need to use more than one method. If you don’t have the ability to upload files to the site, or experience working with HTML, you can choose alternate methods.
Adding an HTML Tag
From the dashboard, click “Manage Property” and then “Verify this property.” If you don’t see the HTML tag option under the “Recommended method” tab, then choose “Alternate methods” and choose “HTML tag.” This will give you the code you need for verification.
Copy the code and use your HTML editor to open the code for your website’s homepage. Paste the code from Google into <head> section of your HTML code. If there’s something else in the <head> section of your website, there’s no need to worry about where the code goes in relation to the other code. If you don’t have a <head> section, you can create one to verify the site.
Once you know the code has been added to your website, go back to the Google Search Console dashboard and click “Verify.” Google will check the site for the code. If it finds the code, you’ll be told the site has been verified. If it does not find the code, you’llget information about the errors.
Once the site is verified by Google Search Console, do not remove the code. Doing so will cause the site to revert to unverified.
Uploading an HTML File
You can only use this method if you have access to the root directory via FTP or the web hosting control panel.
From the dashboard, click “Manage Property” and then “Verify this property.” If you don’t see the HTML file upload option under the “Recommended method” tab, then choose “Alternate methods” and choose “HTML file upload.” This will allow you to download the file you need for verification.
Upload the file to the site’s root directory. You should not make any changes to the file – either in terms of the content or the file name. If changes are made, Google Search Console will not be able to complete verification.
Once you know the file has been uploaded to your website, go back to the Google Search Console dashboard and click “Verify.” Google will check the site for the file. If it finds the file, you’ll be told the site has been verified.
As with the HTML tag method above, do not delete the file after verification, or it will revert to unverified.
Verifying with Your Domain Name Provider
Your domain name provider is the company where you purchased your domain. Usually, this is the same as your web hosting company, but it does not have to be. When you verify using your domain provider, you’re proving to Google that you own the main domain – and everything associated with it. This is a good option for large websites.
From the dashboard, click “Manage Property” and then “Verify this property.” If you don’t see the domain name provider under the “Recommended method” tab, then choose “Alternate methods” and choose “Domain name provider.”
At this point, you’ll be asked to choose your provider from a list of the most commonly used, such as GoDaddy, Namecheap, and Bluehost. If you do not see your provider on this list, choose “Other.” You’ll then be presented with instructions on how to create a DNS TXT record for your provider. If this doesn’t work with your provider, you can create a CNAME record instead.
Adding Your Google Analytics Code
If you’re already using Google Analytics to keep an eye on your website’s traffic, this will likely be the easiest option for you. Check your site’s HTML code to make sure your tracking code is already in the <head> section of your homepage. If it’s not there, you’ll need to move in there for it to work.
If you’re not already using Google Analytics, but want to kill two birds with one stone, follow these instructions to setup Google Analytics on your site. Then, check to make sure the code isn’t in the <body> section of your website. If it is, move it to the <head> code, then move forward.
From the dashboard, click “Manage Property” and then “Verify this property.” If you don’t see the Google Analytics tracking code on under the “Recommended method” tab, then choose “Alternate methods” and choose “Google Analytics tracking code.” You’ll be given a set of instructions to follow.
Once the site is verified, do not remove your Google Analytics code from your website, or it will revert to unverified.
Using the Google Tag Manager
If you’re already using Google Tag Manager for your site, this could be the easiest way to verify it. If you want to try this method, make sure your “View, Edit, and Manage” permissions enabled in the Tag Manager account. Look at your site’s HTML code to make sure the Tag Manager code is placed immediately after the <body> tag.
From the dashboard, click “Manage Property” and then “Verify this property.” If you don’t see the Google Tag Manager on under the “Recommended method” tab, then choose “Alternate methods” and choose “Google Tag Manager.”
Click Verify. If Google finds the code, you’ll get a message to let you know the site is verified. Once the site is verified, do not remove your Google Tag Manager code from your website, or it will no longer have a verified status.
Linking Google Analytics with Google Search Console
Though it may seem like Google Analytics and Google Search Console offer the same data, there are some notable differences between the two. Analytics provides more information about the people who are visiting your site. You’ll see how many visitors are coming, how they’re coming to your site, how long they’re hanging out there, and where they’re geographically coming from.
Search Console, on the other hand, provides more internal information, showing you the websites that link to you, if there is any kind of malware on your website, and the keywords queries that your site is showing up for.
The two platforms do not treat some information the same way, so if you think you’re looking at the same report, you’ll likely not getting the same information in both places. Linking the accounts together helps you get the most of the information found in both products. This integrates the data from both sources so you can get more reports that you can only access when the accounts are linked.
Once your site is added and verified in Search Console, choose the site you’re trying to connect. Look for the gear icon, click it, and select “Google Analytics Property.” Now, you’ll see a list of all the accounts in your account, so you just click the one that matches the property you want to link it to and you’re done. Totally easy, and totally worth the extra information you’ll get.
Adding Your Sitemap
Sitemaps help the search engine robots get information about how your website is organized, and the kind of content they can find there. It helps them see how often your website is updated, and the images and video content, too.
When you submit your sitemap to Google Search Console, you’re making it easier for Google because the robots get the information they need to index and rank your site more efficiently. You do not have to submit the sitemap, and there is no penalty if you choose not to. But, it’s a good idea to do this if:
- You’re a new site and don’t have a lot of backlinks yet
- You’re an incredibly large website
- You have a website with a lot of pages that aren’t linked together well
You have to have your site verified before you can submit the sitemap.
From your dashboard, choose the site you want to submit the sitemap for, and then look for the “Crawl” option on the left. Under it, you should see the “Sitemaps” option. Click that, then click the “Add/Test Sitemap” option. Fill in the address of your sitemap. It’s often /sitemap.xml, but double check where it is on your site before you add it.
Checking Your Robots.txt File
Chances are there are directories and files on your website that you don’t want to have listed in the search engines. This is true of several directories in WordPress, such as wp-admin. You can use a robots.txt file to tell the search engines which files you don’t indexed. But, it’s important to remember these aren’t a surefire guarantee that robots will ignore them. While Google’s crawlers will accept these instructions, other crawlers from smaller or lesser known, and lesser reputable engines may not. Certain web crawlers may interpret the instructions differently. This file won’t stop other websites from linking to content you don’t want indexed.
You can find your robots.txt Tester under the Crawl menu on the left side of the screen. This will let you see what files are allowed to be indexed, and which ones aren’t. You can use the tool to make changes to the file, and see any errors it may find. It’s also possible to enter a URL to allow or disallow, and then run a test to see if the URL is something the crawler recognizes.
Changes made in the robots.txt file in the Google Search Console won’t be made on the actual file hosted on your site. You can download the edited file from the console, then upload it where the old one was on your host – in the root of your domain. Once that’s done, you can click “verify live version” to make sure Google knows you’ve updated the file and you want them to craw it again.
Fetch as Google
If you’ve made a lot of changes to your website, the quickest way to get those update indexed is to submit them manually, so the changes will appear in the results as soon as possible, rather than waiting on the next Google crawl.You can select the URL you want to submit, being mindful to use WWW if and only if your website uses the prefix. Under the Crawl menu on the left side, you’ll see the option to Fetch as Google.
Leave the next screen blank if you want to crawl the entire site – or fill in the URL of the page. Click Fetch and Render. It may take a few minutes, depending on the size and number of the pages you’re fetching.
After this is finished, you can click the “Submit to Index” button. You can choose to crawl only this URL, or crawl this URL and its direct links. Choose the first one if you want to index only the single page, and the second option if you want to index the entire site.
Wait for the indexing to finish, andthen you’ll see your site show up in the search results in a few days.
Site Errors
You don’t want any errors on your website, but it’s possible something could happen and you’re not aware of it unless someone else tells you. Google’s Search Console can be that someone, letting you know if there are any problems when and if it finds them.
If you want to check your site for internal errors, select the site you want to check, then click “Crawl” > “Crawl Errors.” From here, you’ll see a list of URLs that have errors when Google bots crawl it. You can click the error to get more details about the error and when it happened.
Record the errors and include screenshots if appropriate. If you aren’t the one who handles the site errors, get in touch with the person who can handle everything.
Using the Google Search Console
The Google Search Console is a useful source of information as a webmaster and marketer. It helps you see what’s going on with your website internally, and ensures Google gets the information they need for indexing and ranking.
How do you use Google Search Console in your business?

OTHER ARTICLES YOU MIGHT BE INTERESTED IN

AI in Addiction Marketing: Leveraging Automation and Data-Driven Personalization

Beyond the 'Call Now' Ad: Using Funnel-Based Messaging to Nurture Drug Rehab PPC Leads


Winning the Local Search War: How to Master Google's Map Pack for Rehab Admissions

The Non-Negotiables: Navigating LegitScript and HIPAA Compliance for Drug Rehab Paid Search

The E-E-A-T SEO Playbook: Building Unshakeable Trust for Your Rehab Center in 2025

Beyond the Bed Count: Marketing Client-Centered and Trauma-Informed Care

Contact us today to get the conversation started!